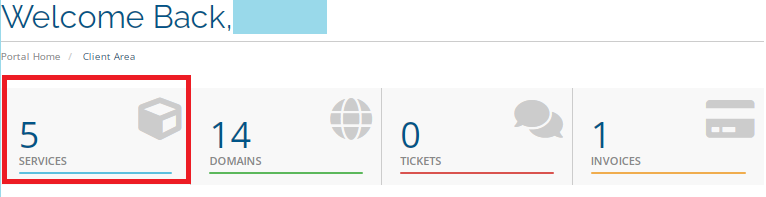
1. From the home page of your HayHost client area, click "SERVICES".
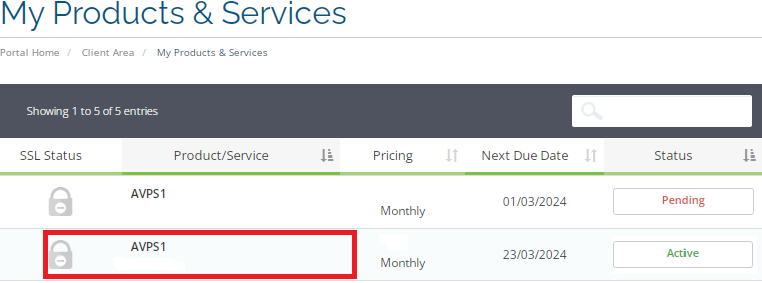
2. Select the server on which you would like to log in via the console.
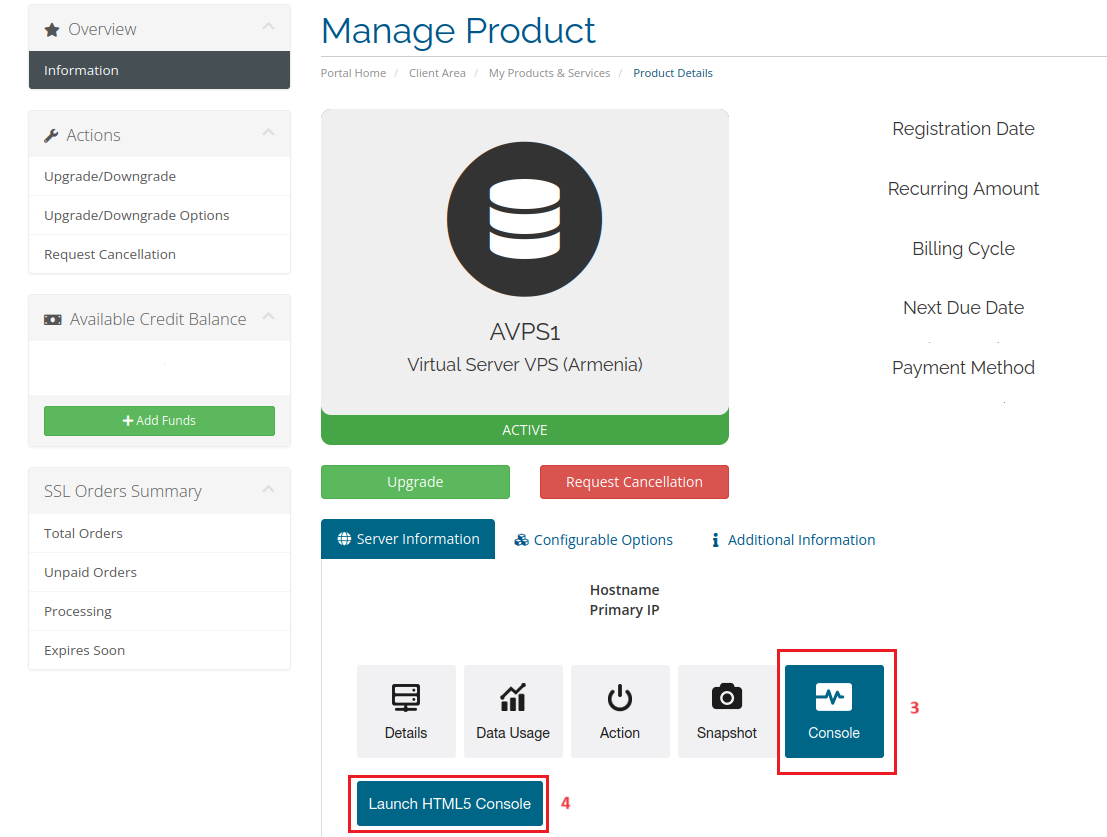
3. Activate the console screen, and click on the "Console".
4. Click "Launch HTML5 Console".
5. To log in, use your root user and the root password that you received via "Email".
6. Type nmtui and press "Enter".
[root@servername ~]# nmtui
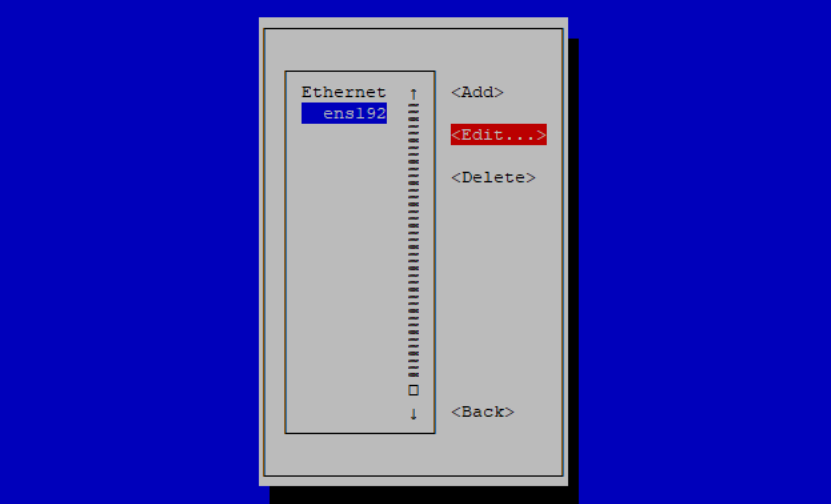
7. Click on the "Edit a connection".
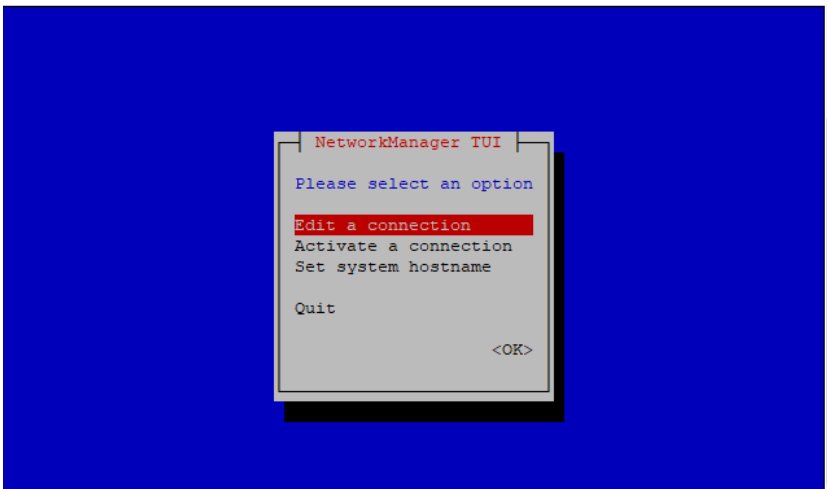
7. Click on the "Edit" button.
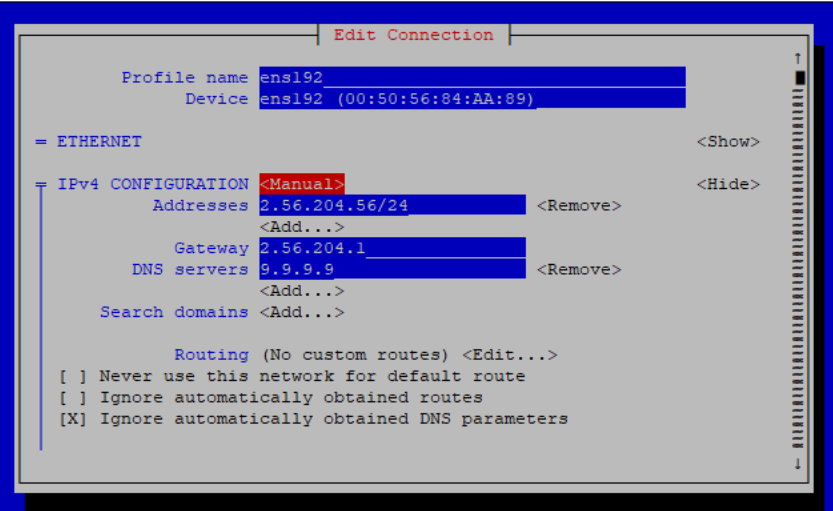
8. In this opening Window, type your "IP Address" and press "OK".
9. Press "quit" to close the nmtui window.
- to apply those changes, pressing "quit" usually prompts the tool to ask whether you want to apply the changes before exiting. If you confirm, the changes will take effect.
10. For applying Network changes type the following commands:
[root@servername ~]# systemctl restart network
or
[root@servername ~]# systemctl restart NetworkManager