How to Configure Static IP Configuration on Windows 11

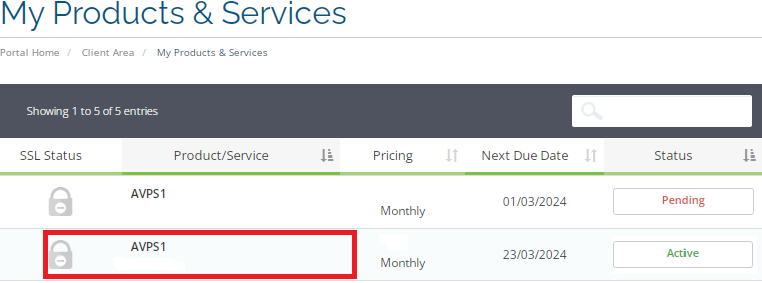
1. From the home page of your HayHost client area, click "SERVICES".


2. Select the server on which you would like to log in via the console.
 

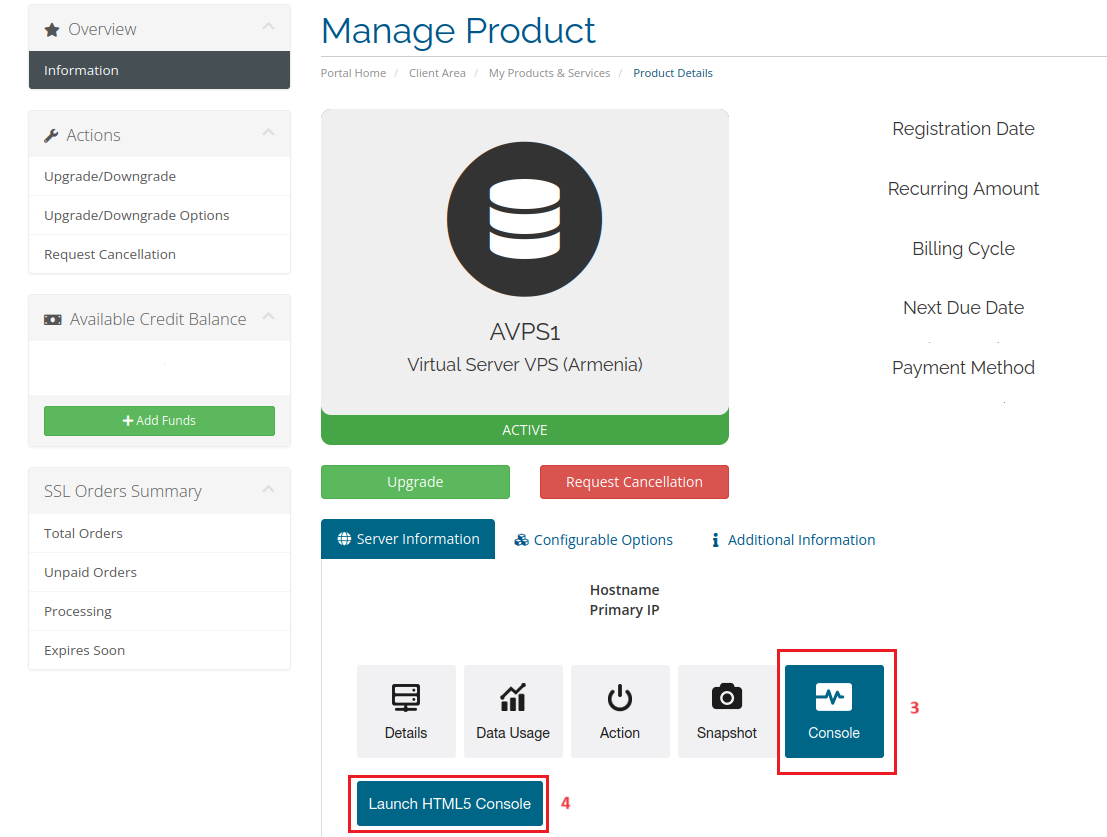
3. Activate the console screen, and click on the "Console".

4. Click "Launch HTML5 Console"


To log in, use your root user and the root password that you received via email.

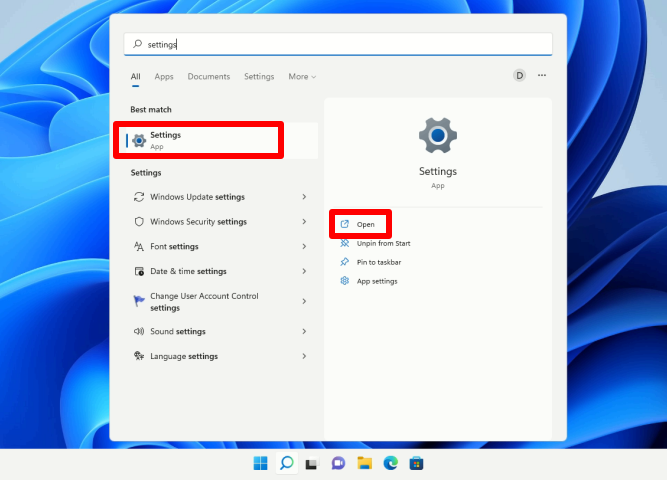
4. Open the Settings app:
 

5. Go to "Network & internet" and select your network interface. (Ethernet & WiFi)
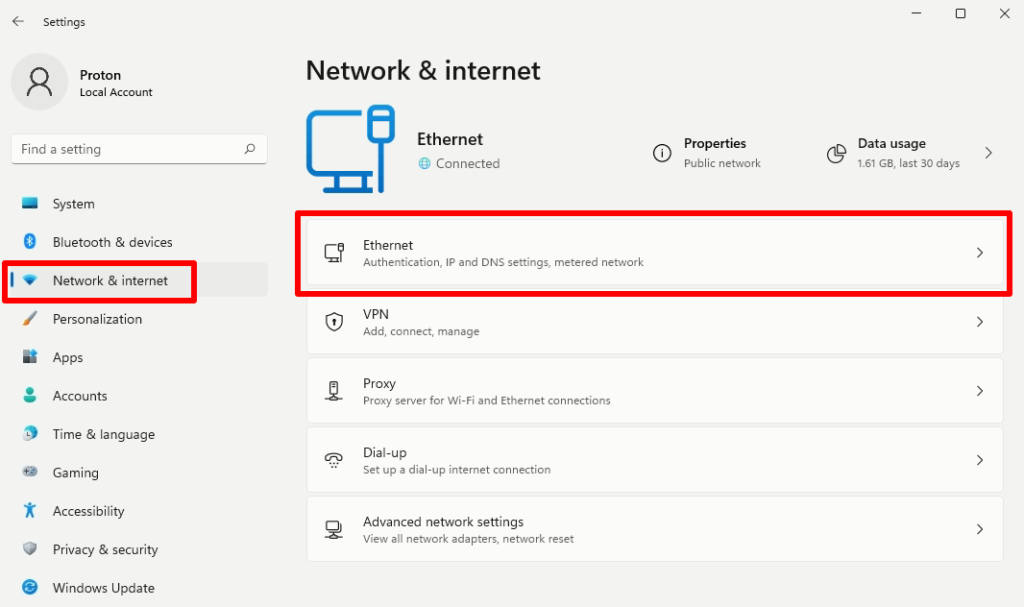
 

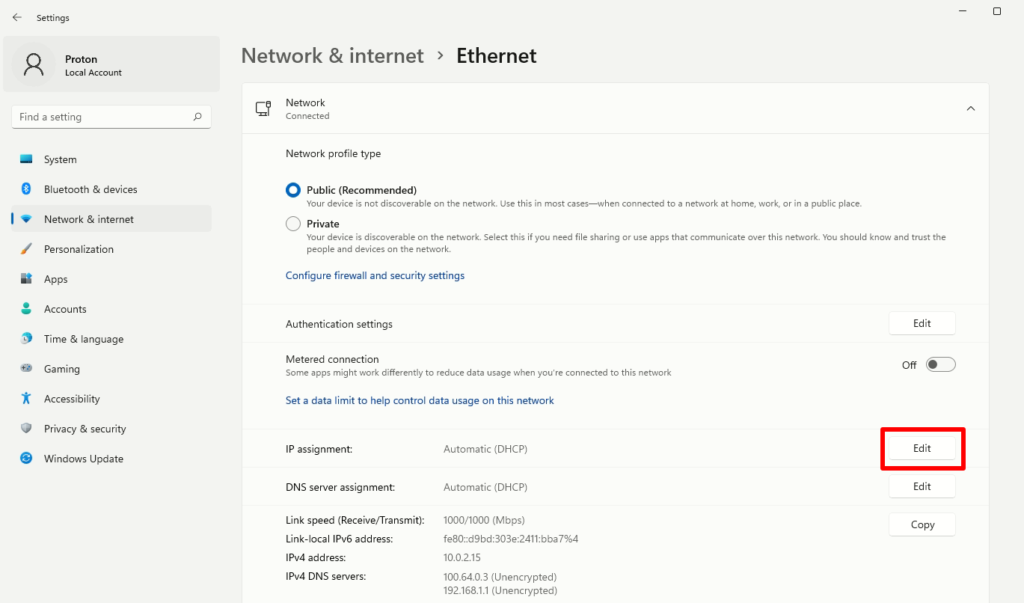
6. If you have an Ethernet connection, click "IP assignment" then click "Edit".
 

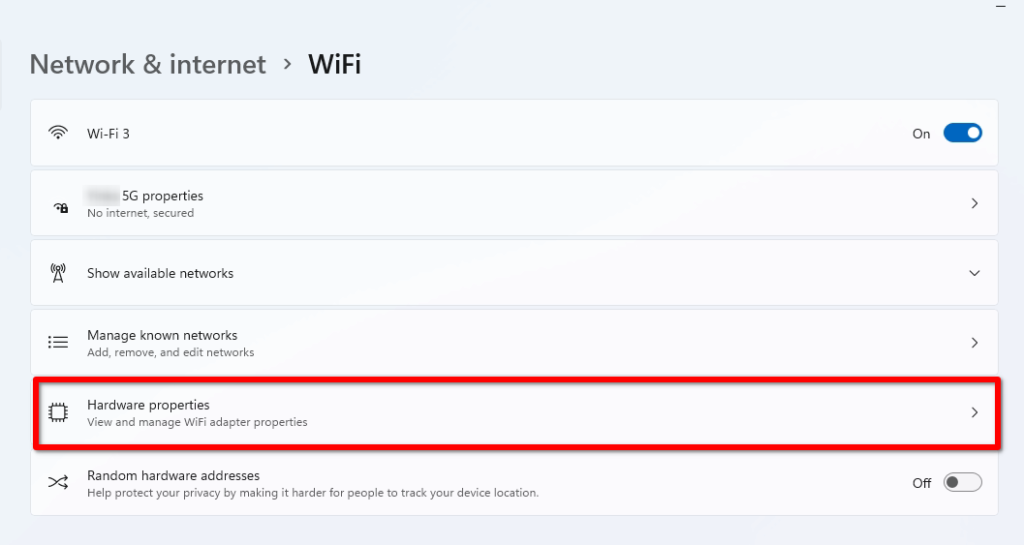
7. If you have a WiFi connection, click "Hardware Properties".
 

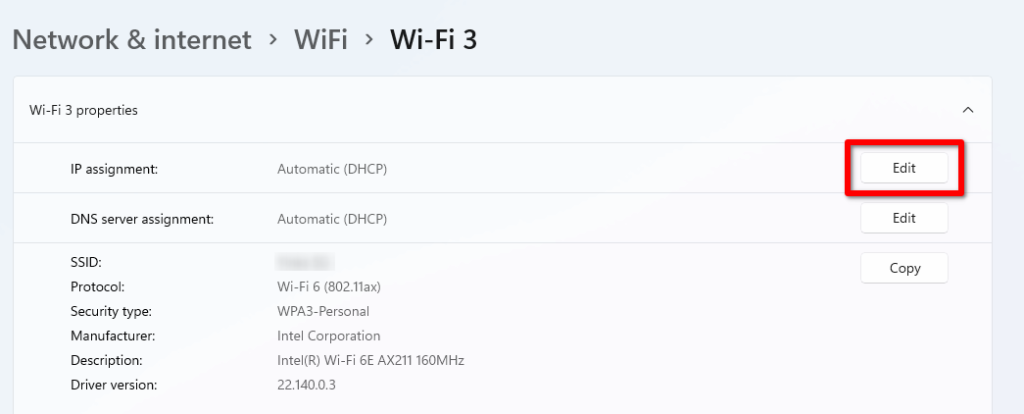
8. Click "Edit".


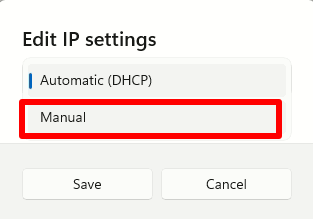
9. Click on the  Automatic (DHCP) and select "Manual".
 

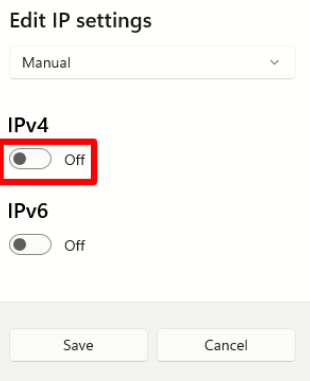
10. Turn On IPv4.
11. Fill your IP address that you received via "Email".
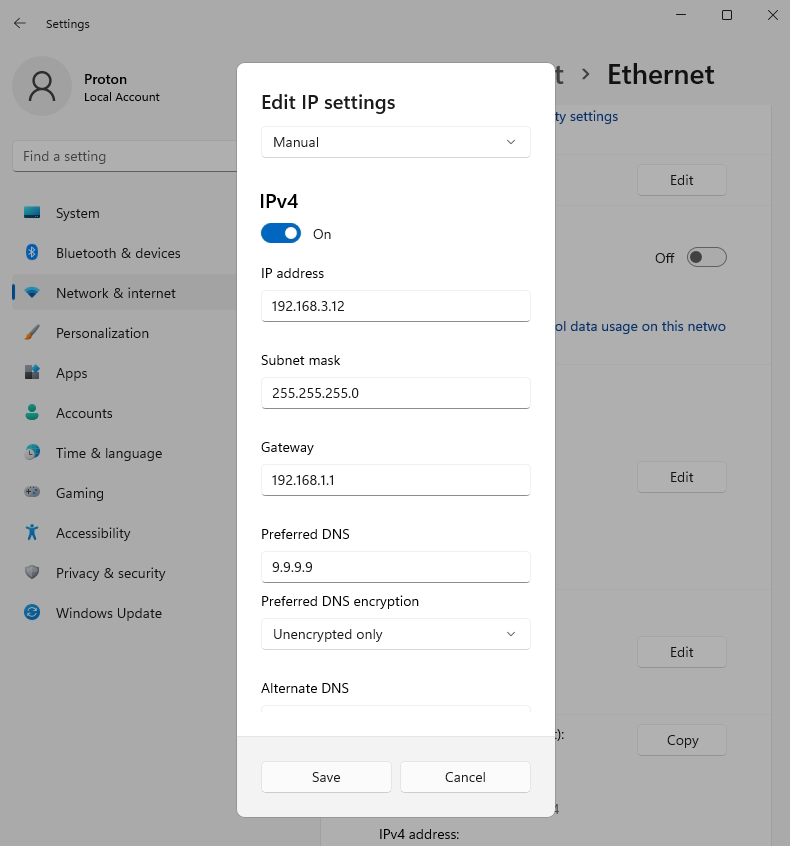
 

12. Click "Save" when finished.

  • 0 Users Found This Useful
Was this answer helpful?

Related Articles

How to Configure Static IP Address on CentOS 7

1. From the home page of your HayHost client area, click "SERVICES".   2. Select the server...

How to Install XRDP Server (Remote Desktop) on Debian 11/12

1. Update and Upgrade Debian 11/12 apt update && sudo apt upgrade -y   2. Install the...

How to buy a Virtual Server In HayHost

1. Go to the HayHost client area and click "Order New Services" in the bottom left corner....

How to Configure Static IP address on Ubuntu 20.04

1. From the home page of your HayHost client area, click "SERVICES".   2. In the My Products...

How to Connect to Your Server via RDP on Windows 7

1. Օn your computer, access the "Start" menu, search for "Remote Desktop Connection" then click...