How to Configure Static IP address on Ubuntu 20.04

1. From the home page of your HayHost client area, click "SERVICES".


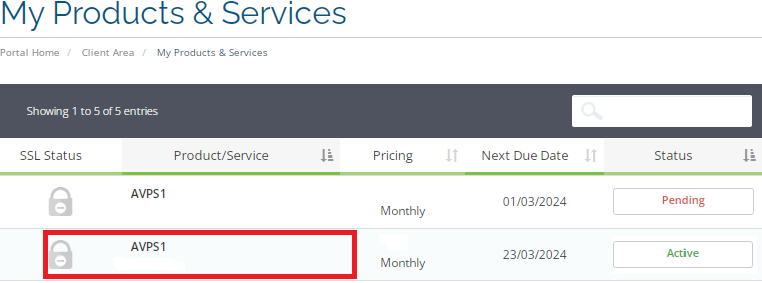
2. In the My Products & Services section, select the server on which you would like to log in via the console.
 

3. Activate the console screen, and click on the "Console".

4. Click "Launch HTML5 Console".
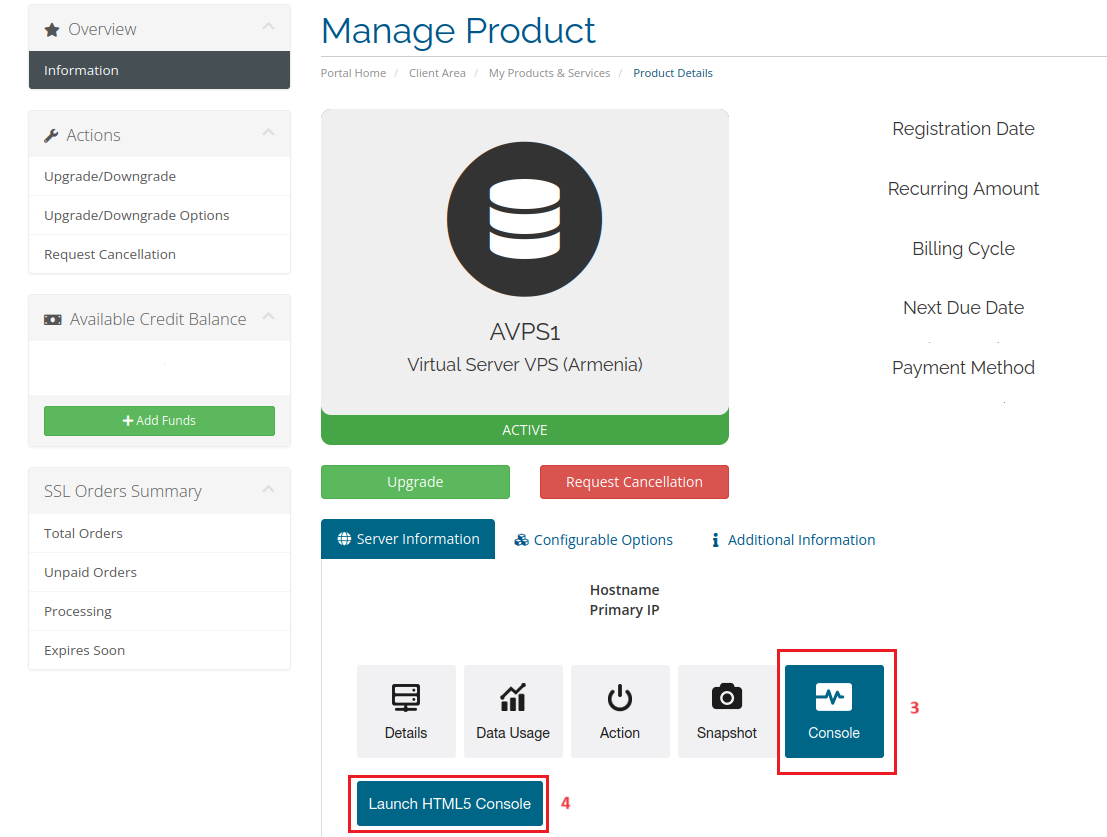
 

To log in, use your root user and the root password that you received via "Email".

5. At first type the command

sudo su

6. Open the configuration file with an editor

nano /etc/netplan/99-netcfg-vmare.yaml

or

nano /etc/netplan/00-installer-config.yaml

7. Edit the configuration file.

network:
     version: 2
     renderer: networkd
     ethernets:
        ens160:
          dhcp4: no
          dhcp4: no
          addresses: [198.192.11.1/24]
          gateway4: 198.192.11.1
          nameservers:
            addresses:
              - 198.192.11.1
              - 9.9.9.9

  • Press Ctrl + X to start the exit sequence.
  • If you've made changes, nano will prompt you to save them. Press "Y" for "Yes" to confirm.

8. Type the command to apply the Netplan configuration.

netplan apply

  • 0 Пользователи нашли это полезным
Помог ли вам данный ответ?

Связанные статьи

How to Configure Static IP Address on CentOS 7

1. From the home page of your HayHost client area, click "SERVICES".   2. Select the server...

How to Install XRDP Server (Remote Desktop) on Debian 11/12

1. Update and Upgrade Debian 11/12 apt update && sudo apt upgrade -y   2. Install the...

Как купить виртуальный сервер в HayHost

1. Нажмите «Заказать новую услугу» в левом нижнем углу главной страницы HayHost.   2. Нажмите...

Как подключиться к вашему серверу через RDP в Windows 7

1. На своем компьютере откройте меню «Пуск», найдите «Remote Desktop Connection» и щелкните его....

Как подключиться к вашему серверу через RDP в Windows 10/11

1. На своем персональном компьютере перейдите в меню «Пуск», введите «Remote Desktop Connection»,...