-
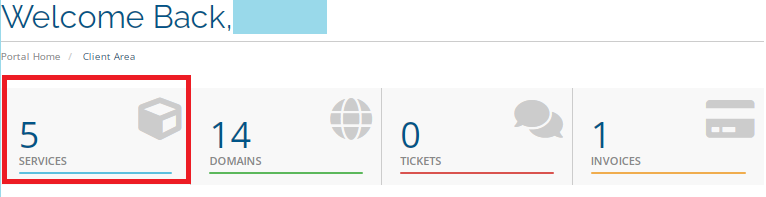
Ձեր HayHost հաճախորդի տարածքի գլխավոր էջից ընտրեք SERVICES։
-
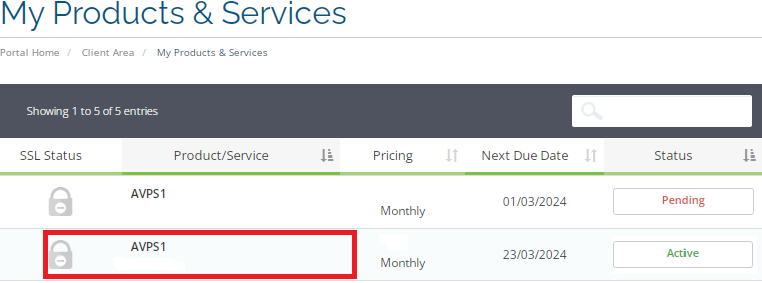
My Products & Services բաժնում ընտրեք այն սերվերը, որի վրա ցանկանում եք մուտք գործել կոնսոլի միջոցով։
3․ակտիվացրեք կոնսոլի էկրանն ու սեղմեք Console։
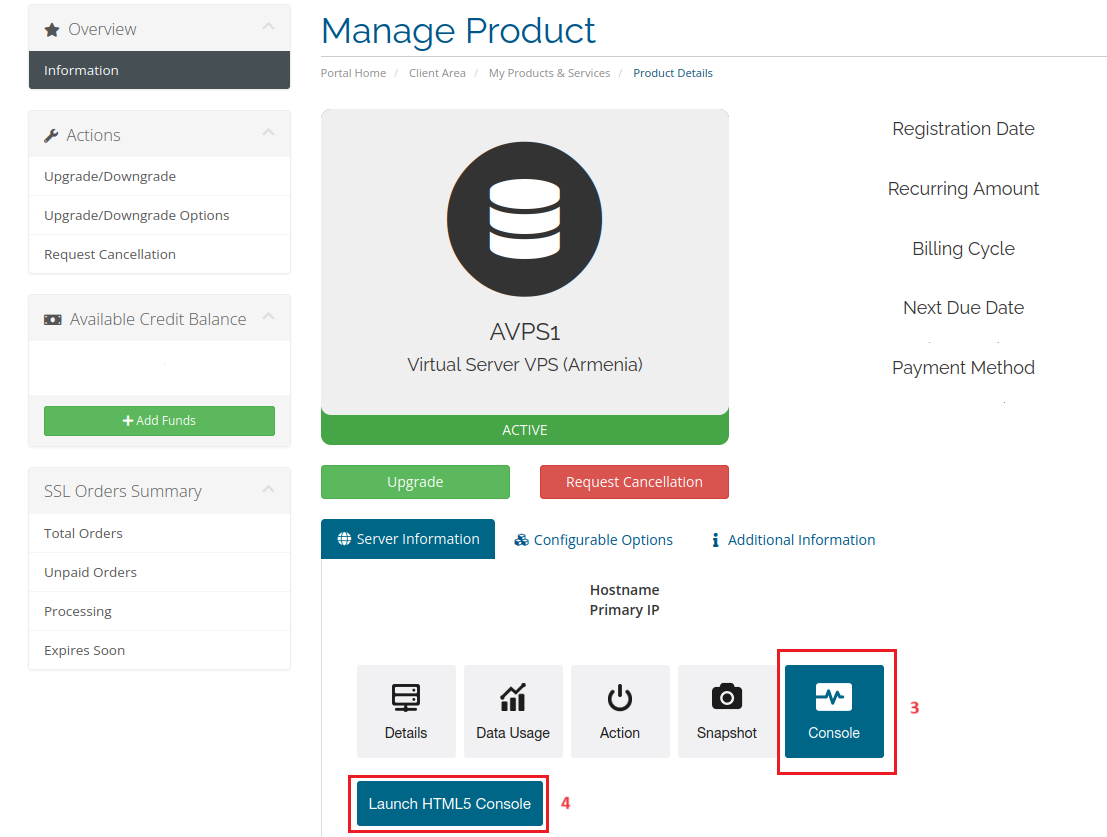
4․Սեղմեք Launch HTML5 Console։
Մուտք գործելու համար օգտագործեք ձեր root օգտատիրոջ անունը և root գաղտնաբառը, որը ստացել եք էլփոստով։
-
Նախ մուտքագրեք հետևյալ հրամանը՝
-
Բացեք կոնֆիգուրացիայի ֆայլը որևէ տեքստային խմբագրիչով
կամ
-
Խմբագրեք կոնֆիգուրացիայի ֆայլը՝ այսպիսի օրինակով.
network:
     version: 2
     renderer: networkd
     ethernets:
        ens160:
          dhcp4: no
          dhcp4: no
          addresses: [198.192.11.1/24]
          gateway4: 198.192.11.1
          nameservers:
            addresses:
              - 198.192.11.1
              - 9.9.9.9
Ելքի համար սեղմեք Ctrl + X։
Եթե փոփոխություններ կատարել եք, nano-ն կպահանջի պահպանել դրանք։ Սեղմեք Y հաստատելու համար։
-
Կիրառեք Netplan-ի կոնֆիգուրացիան՝ մուտքագրելով հետևյալ հրամանը.
